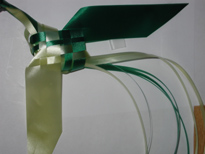
Three Kitty Kreations

Three Kitty Kreations
Point Arena, CA

Three Kitty Kreations
Point Arena, CA

Please note:
Each step is linked to an enlarged instruction page. Just click the graphic.
Step 1
Choose ribbon that is the same on both sides and will tear along its length. Cut 2 identical pieces. For this example, I am using two different colors to help show the weaving in the photos. The length of the ribbon pieces is dependent upon the width. For 1 1/2 inch wide ribbon, I use 2 pieces that are each 22 pieces long. For 2 1/2 inch wide ribbon, I use 25 inch long pieces. For 3/4 inch wide ribbon, I use 2 pieces that are each 14 inches long.
Step 2
Make 3 small cuts in one edge of each piece of ribbon. Space the cuts evenly across the ribbon. After being torn (Steps 3 and 4 below), you will have connected ribbon strips.
Step 3
Take one piece of ribbon (Piece 1). Hold it with the cuts in the edge at the top and tear the small cuts down the length of the ribbon. STOP TEARING SEVERAL INCHES FROM THE BOTTOM. NOT ALL THE TEARS WILL BE THE SAME LENGTH. The right-most tear will be shorter than the others by about 1/4 - 1/2 inch (depending upon the width of the ribbon). The torn strips will be woven into the bird's "body" and the untorn part of the ribbon becomes the "wings" of the bird. The length of the wings is a personal preference and will vary with ribbon width. Larger birds made of wider ribbon can have longer "wings".
Step 4
Take the other piece of ribbon (Piece 2) and tear the small cuts down its length. AGAIN STOP TEARING SEVERAL INCHES FROM THE BOTTOM. For Piece 2, the left-most tear will be shorter than the others by about 1/4 -1/2 inch.
Step 5
On Piece 1, fold the 2 right-most strips OVER THE TOP and at right-angles to the strips on the left side.
Step 6
On Piece 2, fold the 2 left-most strips UNDERNEATH and at right angles to the strips on the right side.
Step 7
Weave the strips of Piece 1 over and under as in the photo. Repeat the process for the strips of Piece 2.
Step 8
Lay Piece 1 on a table on the right of Piece 2 so the folds align. The folds become the "shoulders" of the bird.
Step 9
Weave the strips of Piece 1 into the strips of Piece 2. This forms the "back" (top) of the bird.
Step 10
Turn the entire woven structure over being careful to align the 8 strips (two in each direction).
Step 11
Take the two strips that are on the top and fold them down toward the bottom.
Step 12
Fold the side strips on the left to the right and weave them through the strips that were folded in Step 11.
Step 13
Fold the side strips on the right and weave them through the strips that were folded in Step 11.
Step 14
Fold the remaining strips (on the bottom) towards the top and weave them through the side strips that were folded in Steps 12 and 13.
Step 15
Take the 2 ends that are in front of the bird's "shoulders" on the right and pass them through the woven "body" and out the "neck".
Step 16
Repeat the process with the 2 ends that are in front of the bird's "shoulders" on the left.
Step 17
Take the 2 ends that are behind the bird's "wings" on the right and pass them through the woven "body" and out the tail.
Step 18
Repeat the process with the 2 ends that are in behind the bird's "wings" on the left.
Step 19
Pull the two groups of ends tight, creating the bird's "body" between.
Step 20
Tie an overhand knot in the ends that come out of the "neck" forming the head and beak. Cut the beak to an appropriate length.
Step 21
Make a small cut in the edge of the ends that coming from the tail and tear each down the length to the "body". Trim the length of the bird's "tail" if desired.

If you want to comment on our Website, please feel free to contact Wookie at 3kitty.org.
| Home | Three Kitty Photo |
Jan's Travel-Rama | Yoda's Tales | Three Kitty Konstruction |
|---|---|---|---|---|
| Three Kitty Kreations | Three Kitty Kommunity | Three Kitty Kompany | Three Kitty Kuisine | Jan's Personal Note |
Website
v.2.1 design by Three Kitty Komputing, Point Arena, CA 